For ceiling fan installation, consider the following areas:
- Measure Your Room: Determine the square footage of your room to choose a ceiling fan with the right blade span.
- Small rooms (under 76 sq ft): 29-36 inch blade span.
- Medium rooms (76-144 sq ft): 36-42 inch blade span.
- Large rooms (over 144 sq ft): 44-54 inch blade span.
- Very large rooms (over 225 sq ft): 54 inches or larger.
- Consider Ceiling Height: Select the appropriate downrod length for your ceiling height to maintain 7-9 feet distance from the floor.
- Standard ceilings (8-9 feet): Use a standard downrod.
- Lower ceilings (<8 feet): Consider a flush mount.
- Higher or sloped ceilings: Opt for a longer downrod or an angled mount.
- Evaluate Airflow and Efficiency: Check the fan’s CFM (cubic feet per minute) for airflow and look for energy-efficient, Energy Star rated models.
- Choose Your Style: Match the fan’s design with your room’s decor. Options include traditional, modern, rustic, or tropical styles.
- Prioritize Quiet Operation: Ensure the fan operates quietly, especially important in living or sleeping areas.
- Decide on Lighting and Features: Consider if you need integrated lighting and additional features like reversible blades or remote controls.
- Installation Tips:
- Turn off power at the circuit breaker.
- Remove the old fixture and install the ceiling bracket from the fan kit.
- Follow the manufacturer’s instructions to assemble and connect the fan.
- Ensure all connections are secure and use wire connectors.
- Test the fan after installation.
Ceiling fans are more than just decorative elements in a home; they are a practical and efficient way to enhance comfort and air circulation in any space.
Whether you’re looking to install a new ceiling fan or replace an old one, understanding the basics of ceiling fan selection and installation is crucial.
This guide will walk you through the essentials of choosing the right ceiling fan for your home, focusing on factors like room size, ceiling height, and style preferences.
We’ll also delve into the step-by-step process of installing a ceiling fan, ensuring you have all the knowledge needed for this common yet impactful DIY project.
From assessing the appropriate blade span to mastering the installation nuances, we aim to simplify the journey from selection to the satisfying click of your new ceiling fan humming to life.
You can also check out our Podcast Episode of Ask the Trade Pros, where professional electricians Jordan and Todd offer expert advice on how to pick out and install a ceiling fan.
You can listen to the Podcast episode below:
If you encounter any complexities or prefer the assurance of professional installation, Done Rite Services is here to help. Our skilled team offers a comprehensive range of electrical services to suit your electrical needs. For personalized assistance, contact Done Rite Services at (520) 369-3966.
Table of Contents
Selecting the Perfect Ceiling Fan for Your Home
Finding the right ceiling fan is a crucial step before diving into the installation process. A well-chosen fan not only complements your room’s aesthetics but also ensures optimal air circulation and efficiency. Here’s how to make an informed selection:
- Measure Your Room:
Start by assessing the size of your room. This measurement is key to selecting a fan with the appropriate blade span, which directly impacts the fan’s effectiveness. For smaller rooms (under 76 square feet), a fan with a 29 to 36-inch blade span is suitable. Medium-sized rooms (76 to 144 square feet) work best with a 36 to 42-inch blade span. Larger rooms will require a fan with a 44 to 54-inch blade span. For very large spaces (over 225 square feet), look for fans that are 54 inches or larger.
- Consider the Ceiling Height:
Your ceiling height determines the type of mount needed for your fan. Standard ceilings (8 to 9 feet high) typically use a standard downrod mount. For ceilings lower than 8 feet, a flush mount is ideal to maintain headroom. Conversely, higher or vaulted ceilings might necessitate an extended downrod or an angled mount for optimal placement and airflow.
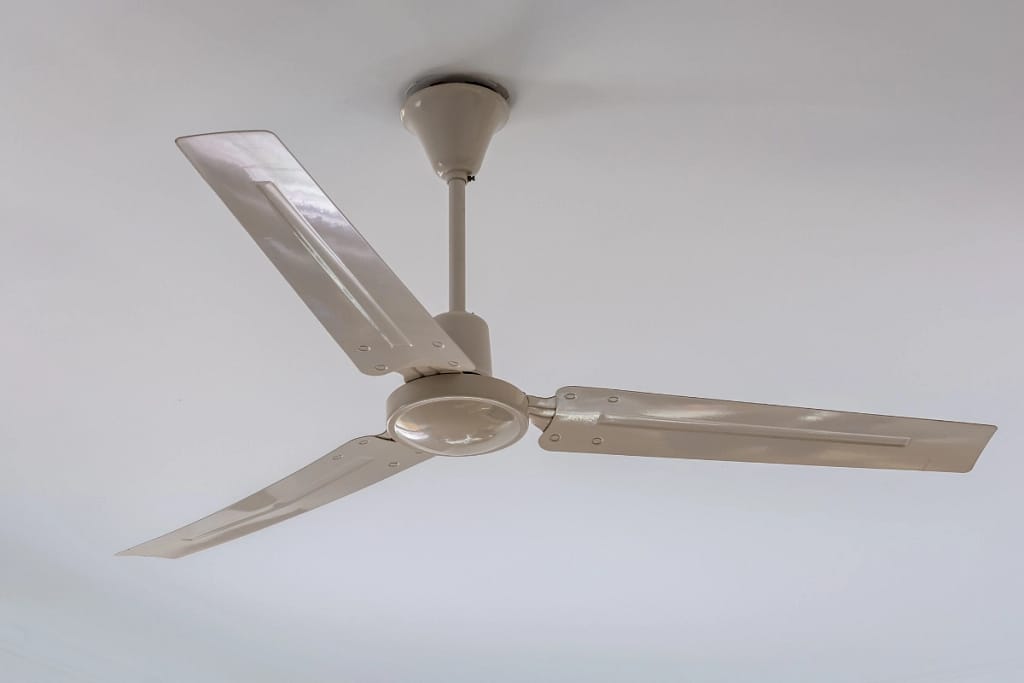
- Style and Design:
Ceiling fans are available in an array of styles, from traditional to modern, rustic, and even tropical designs. Choose a style that complements your room’s existing décor. Pay attention to the finish as well — popular options include brushed nickel, oil-rubbed bronze, and classic white wood. The fan should enhance your room’s overall look, whether by blending in seamlessly or serving as a statement piece.
- Airflow and Efficiency:
Airflow is measured in cubic feet per minute (CFM), with higher CFM indicating better air movement. For energy-conscious consumers, consider an Energy Star-rated ceiling fan, which offers superior efficiency.
- Additional Features:
Modern ceiling fans come with various additional features such as integrated lighting, reversible blades for different seasons, remote controls, and even smart home compatibility. Decide which features align with your needs and preferences for added convenience and functionality.
By carefully considering these aspects, you’ll be well on your way to choosing the ideal ceiling fan that offers the perfect blend of style, efficiency, and comfort for your home.
Ceiling Fan Installation Essentials
Embarking on the journey of installing a ceiling fan is not just about adding a functional appliance to your room; it’s about enhancing the comfort and aesthetic appeal of your living space. Let’s break down the key steps to ensure a smooth and successful ceiling fan installation.
- Gathering the Right Tools and Materials:
Before you begin, assemble all the necessary tools for your project. You’ll need a screwdriver, wire strippers, wire connectors (avoid using just tape for connections), a voltage tester, ladder or step stool, and pliers. It’s essential to have everything on hand to avoid interruptions once you start the installation process.
- Safety First:
Safety is paramount when dealing with electrical installations. Start by turning off the power at the circuit breaker or fuse box to ensure a safe working environment. Use your voltage tester to verify that there is no electricity flowing through the circuit where you will be working.
- Removing the Old Fixture:
If you’re replacing an existing fixture, carefully remove it. This typically involves unscrewing the fixture and gently disconnecting the wiring. Be mindful of the wiring as you will need to reconnect these to your new ceiling fan.
- Installing the Ceiling Bracket:
The ceiling fan kit comes with a specific bracket that needs to be securely attached to the electrical box in the ceiling. Use the provided screws to firmly fix the bracket in place, as this will support the weight of the fan.
- Assembling the Fan:
Ceiling fans come in various designs, and each model may have a slightly different assembly process. Follow the manufacturer’s instructions closely. Some fans have clip-on blades, while others might require screws and washers. Pay attention to these details for a proper assembly.
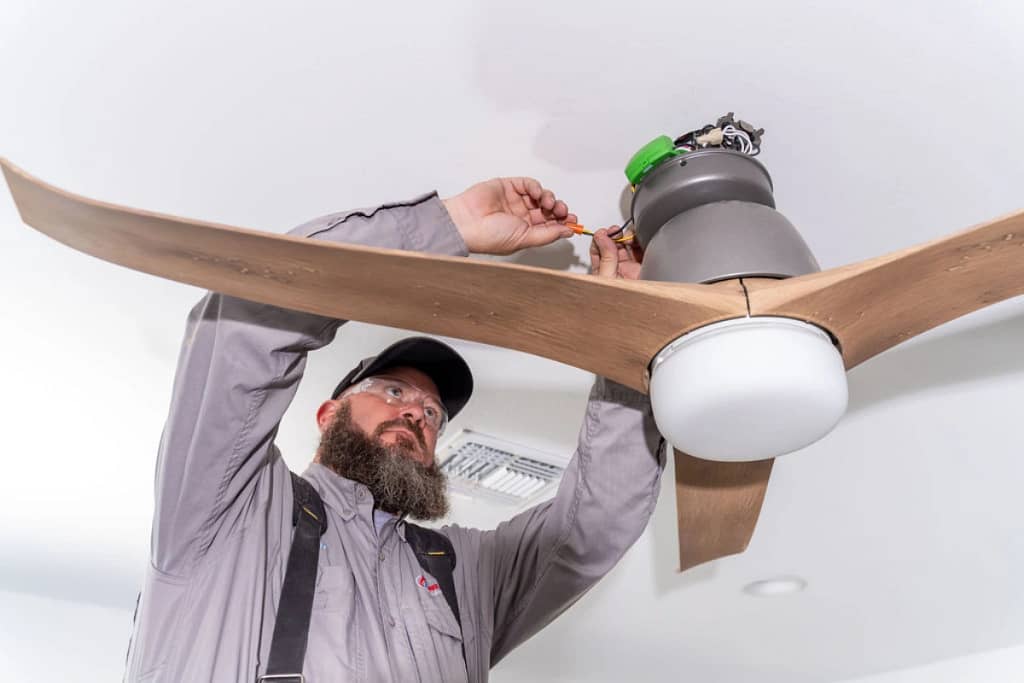
- Wiring the Fan:
This step is crucial for the functionality of your fan. You’ll typically encounter a black, white, and green or bare copper wire from both the ceiling and the fan. Ensure you match the wires correctly – black to black, white to white, and the green or bare copper wire to the ground. Proper connections are essential for both safety and the fan’s operation.
- Final Checks and Testing:
Once the fan is installed, it’s time to restore power and test your installation. Check for any unusual noises, ensure that the fan operates smoothly at different speeds, and confirm that any integrated lights work correctly.
Remember, if at any point the installation process seems overwhelming or beyond your comfort zone, it’s wise to consult or hire a professional electrician. They can ensure that your ceiling fan is installed safely and correctly.
Mounting Your Ceiling Fan Correctly
Once you have selected the perfect ceiling fan for your room, the next critical step is to mount it correctly. Proper mounting not only ensures the fan’s optimal performance but also its safety and longevity. Here are key considerations and steps to follow:
- Choosing the Right Mount Type:
The type of mount you need depends largely on your ceiling height and structure. For standard 8 to 9-foot ceilings, a standard mount with a three-inch downrod is usually sufficient. If your ceiling is lower than 8 feet, a flush mount is recommended to maintain adequate clearance. For higher or sloped ceilings, an extended downrod or an angled mount will be necessary to ensure the fan hangs at the right height and angle.
- Installing the Mounting Bracket:
Begin by securing the mounting bracket that comes with your ceiling fan to the electrical box in the ceiling. This bracket is crucial as it supports the fan’s weight. Ensure that it is attached firmly using the provided screws to prevent any wobbling or instability.
- Attaching the Downrod (if applicable):
If your fan design includes a downrod, attach it to the fan motor housing as per the manufacturer’s instructions. Ensure that all screws and pins are securely fastened to prevent any movement or noise during operation.
- Aligning the Fan Blades:
Carefully attach the fan blades to the motor housing. Depending on the fan model, this could involve clip-on or screw-in mechanisms. Ensure that the blades are evenly aligned and securely fastened to avoid imbalance or vibration.
- Considering Ceiling Angle:
For angled or vaulted ceilings, ensure that the fan is mounted with the correct adapter or downrod length to maintain stability and efficiency. The angle should not impede the blades’ rotation or the fan’s functionality.
- Final Safety Check:
Once the fan is mounted, double-check all connections and mounts. Ensure everything is tight and secure. This step is crucial to prevent any accidents or malfunctions after installation.
Proper mounting is essential for the safe and efficient operation of your ceiling fan. While these steps are generally applicable, always refer to the specific instructions provided with your ceiling fan model. And remember, if you are unsure about any part of the process, seeking assistance from a professional is always a safe and wise decision.
Wiring and Safety Considerations
Properly wiring your ceiling fan is critical to ensure it operates safely and efficiently. This stage requires careful attention to detail and adherence to safety protocols. Here’s a guide to help you navigate the wiring process:
- Understanding Ceiling Fan Wiring:
Ceiling fans typically include three main wires – a black (or red) wire for power, a white wire for neutral, and a green or bare copper wire for grounding. It’s essential to identify these wires in both your ceiling connection and the fan’s wiring.
- Making Secure Connections:
Connect the black wire from the fan to the black (or red) wire in the ceiling. This wire is responsible for powering the fan. Next, connect the white wires (neutral) from the fan and the ceiling. Finally, ensure the fan’s grounding wire (green or bare copper) is connected to the ground wire in the ceiling. These connections are crucial for the fan’s safe operation.
- Using Wire Connectors:
For a secure and safe connection, use wire connectors (commonly known as wire nuts) to cap each connected wire set. This practice is far safer and more reliable than using electrical tape, which can degrade over time.
- Checking for Electrical Codes and Regulations:
Different regions may have specific electrical codes and regulations. It’s important to familiarize yourself with these to ensure your installation complies with local safety standards.
- Final Safety Checks:
Once all connections are made, carefully tuck the wires into the electrical box and secure the fan’s canopy. Ensure all screws and fastenings are tight to prevent any movement or vibration. After completing the installation, restore power at the circuit breaker and test the fan for proper operation.
- When to Seek Professional Help:
If you’re not confident in your electrical skills or encounter complex wiring scenarios, it’s advisable to contact a qualified electrician. Electrical work can be dangerous, and professional assistance ensures your fan is installed safely and correctly.
By following these steps and prioritizing safety, you can effectively complete the wiring phase of your ceiling fan installation. Remember, taking the time to do this correctly is not just about following instructions – it’s about ensuring the safety and functionality of your fan for years to come.
Final Touches: Adjustments and Testing
After successfully mounting and wiring your ceiling fan, it’s time to add the final touches and perform some essential tests. This step ensures that your fan operates as it should, providing optimal comfort and efficiency.
- Adjusting Fan Blades:
Before turning on the fan, check the alignment of the blades. Misaligned blades can cause wobbling and reduce the efficiency of the fan. Adjust as needed to ensure they are evenly spaced and level. Most ceiling fans come with balancing kits to assist in this process.
- Testing the Fan Operation:
Once you’re confident in your installation, restore power to the fan and test its operation. Switch it on and observe its motion at various speeds. Listen for any unusual sounds and observe for any undue wobbling or vibration. These could indicate loose connections or imbalances that need to be addressed.
- Checking Integrated Lighting (if applicable):
If your fan includes lighting, test these features as well. Ensure that all bulbs are securely fitted and functioning. If the fan includes a dimming feature, test it to make sure it operates smoothly.
- Ensuring Remote Control Functionality (if applicable):
For fans with remote controls, pair the remote according to the manufacturer’s instructions and test all functions, including speed settings, light control, and any other features your fan may offer.
- Final Safety and Performance Check:
Conduct a thorough final check of all screws, connections, and mounts. Ensure everything is secure to prevent future issues. It’s also a good idea to review the fan’s operation manual for any additional maintenance tips or recommendations.
- Seeking Professional Advice if Needed:
If you encounter any issues during these final steps, or if you’re unsure about any part of the fan’s operation, don’t hesitate to consult with a professional. It’s important that your fan not only looks good but also operates safely and efficiently.
With these final touches and tests, your ceiling fan installation is complete. Enjoy the improved air circulation and comfort that your new ceiling fan brings to your home.
Conclusion
You’ve now journeyed through the comprehensive process of selecting, installing, and fine-tuning a ceiling fan, enhancing both the comfort and aesthetics of your space. From understanding the importance of the right fan size and style for your room to mastering the intricacies of installation and wiring, this guide has aimed to equip you with the knowledge and confidence needed to undertake this rewarding DIY project.
Remember, the key to a successful ceiling fan installation lies in careful planning, attention to detail, and adherence to safety practices. Whether you’re installing a new ceiling fan or replacing an older model, the process can significantly improve air circulation and add a touch of style to your room.
However, it’s important to recognize when professional help might be needed, especially in aspects of electrical work. If at any point during the installation you feel uncertain or encounter complex challenges, don’t hesitate to consult with a qualified electrician. Safety should always be your top priority.
We hope this guide has provided you with valuable insights and practical steps for installing your ceiling fan. Enjoy the enhanced comfort and aesthetic appeal that your new ceiling fan brings to your home!
For any electrical needs or further assistance, feel free to contact Done Rite Services at (520) 369-3966. Our team of experts is ready to help you with all your electrical requirements.
Frequently Asked Questions
How much should it cost to have someone install a ceiling fan?
The cost to install a ceiling fan typically ranges between $100 to $300. This cost varies based on the complexity of the installation and regional labor rates.
Can I install a ceiling fan myself?
Yes, you can install a ceiling fan yourself if you have basic electrical knowledge and tools. DIY ceiling fan installation can save the cost of hiring a professional.
Can I install a ceiling fan where a light fixture is?
It’s possible to install a ceiling fan where a light fixture exists, as long as the electrical box is rated for the weight and motion of a ceiling fan.
How long does it take to install a ceiling fan?
Installing a ceiling fan usually takes about 2-4 hours. This duration can vary based on the existing wiring, fan type, and the installer’s experience.
